My First 3D Character: A Yay or A Nay?
3D Animation was the major I had chosen to study in when I entered UCSI University. Honestly, I had no idea what I would be studying at the university when I made this decision. I had never touched any 3D software, the least bit of contact I had with anything related to 3D was from watching a 3D animated movie. I had no knowledge whatsoever about how 3D objects or characters were made. It was a totally brand new adventure, a new world that I had never know existed.
The first time I finally got to know my soon to be best friend –Maya 3D Software– was in my second semester. During that period, I learned from scratch the most basic knowledge of how to use the software. I learned from the simplest things like how to open a new project to more complicated steps such as modeling a chair. I learned that in 3D they have something called subdivisions and that each subdivision had a face, four edges, and four vertices. I learned that subdivisions were like cells that built a body. It was really a period where I learned many bizarre things. This knowledge became my foundation, the pillar that supported me in making my first own 3D character, and I’m here to tell you the process of how it came to be.
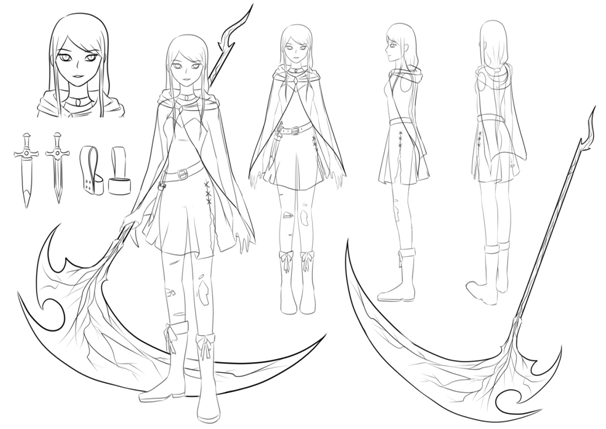
A good character had to have stories behind them. They ought to have a name, age, gender, personality, and other miscellaneous details that will make them feel more humane and real. Therefore, my first 3D character –Laelynn– also started from these written notes:
Name : Laelynn
Age : 22 years old
Gender : Female
Location : Apocalyptic world
Period : 2 years after the doomsday began
Personality : Socially awkward but has a good conscience and kind heart.
Occupation : A well known slayer who had killed countless hybrids (monsters that manifested during the apocalypse)
Goal : To be reunited with her family again.
Signature weapon : A big scythe and a small knife tied to her right hips.
Misc. details : she’s a socially awkward person with a kind and compassionate heart. people are usually scared by her fierce appearance and rarely approach her with their own initiative. After all of the unpleasant events she experienced from socializing, she prefers to stay passive and quiet.
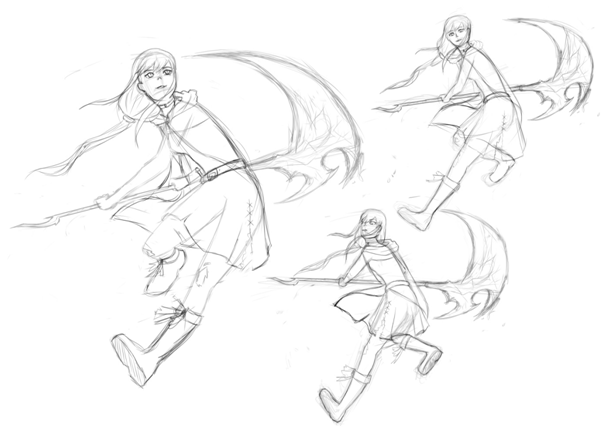
The detailed written information was the core of her life. It was the anchor point that determined the features and gaits of her character design sketches. Below are the sketches of my character:
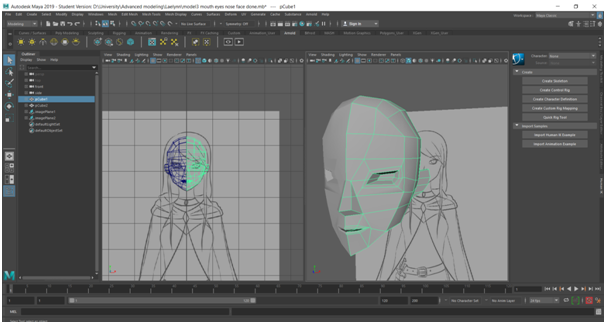
After finishing all the previous steps, I finally entered the second phase: making the 3D model itself. Every 3D designer has their own preferred method, but for me, I like to start everything from the head. You might be shocked, but the head was made from a cube. A cube that was deformed in such a way to resembles a head. The process was similar to sculpting things from clay, but instead of using hand to push and pull the clay, I used a mouse to push and pull the control points (which are the face, edge, and vertex).

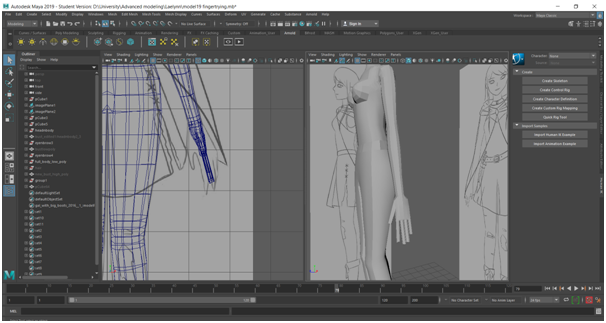
Everything began from a rough shape with sharp edges. My steps of making the body were the following: Head, upper body, legs, and lastly the hands. All of them were shaped from a cube that was molded accordingly to resemble a real human body as separated objects. Only after the rough shaped was finished that I merged all the parts into one whole body. If you were wondering why I separated them in the first place… well, it’s just a way that was most comfortable for me. By doing such, I was able to focus on one part without risking myself being distracted by the other body parts. It might not be the best and efficient method, but it surely was the method that fitted me the best.
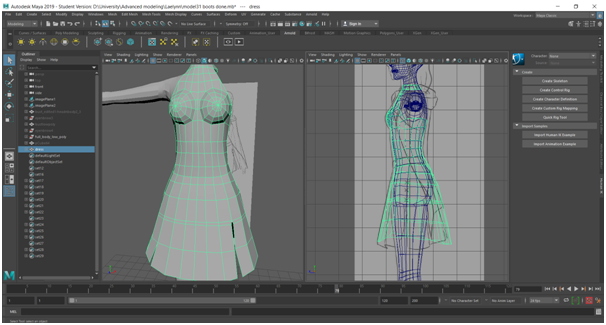
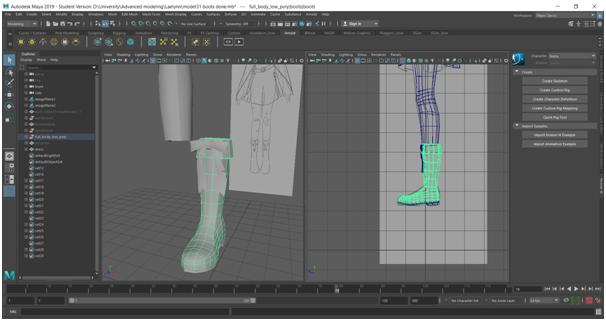
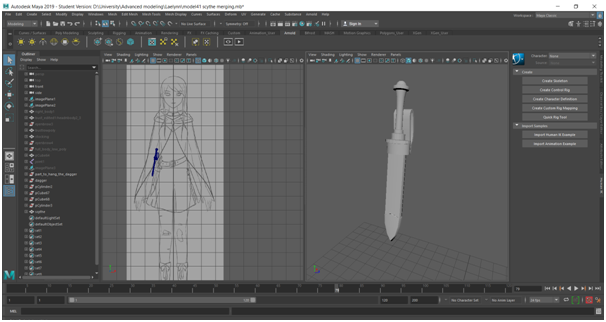
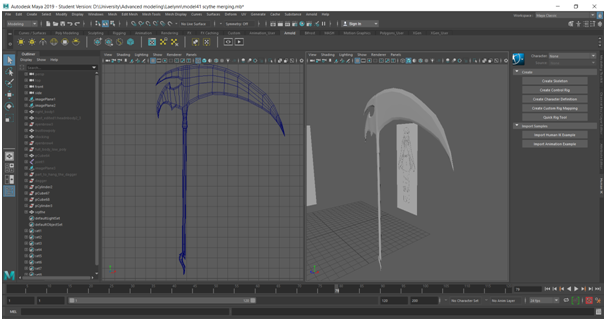
The third step after finishing the main body was adding the details and making the props. Things like eyebrow, eyeball, hairs, boots, clothes, and properties like dagger and scythe were made in this stage. Some of which were made from a cube and some were made from a cylinder.
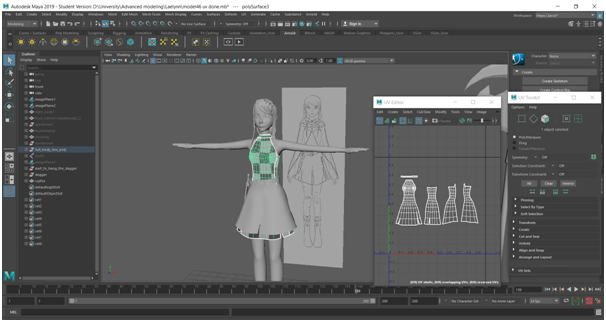
Next was UV mapping the whole 3D character model. For you who don’t know, UV mapping is like unwrapping the skin accordingly, so they’re no overlapping places. Thus, when you prepare the wrap (or in this case the textures) it will envelop the 3D model snuggly without leaving any places uncovered and made everything looked seamless. I honestly think the most difficult part was doing the UV map for the head and the hair. The head was hard because it had many details such as the eyeholes, lips, and ears. While for the hair, I think it’s hard because I had to try several times before I could find the appropriate way to unwrap the UV map in order to make the hair texture goes in one direction.
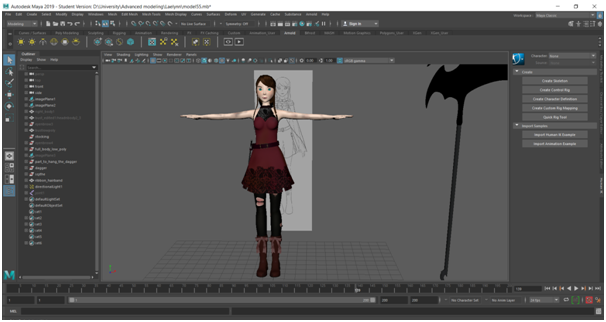
The fifth stage was painting and putting textures on my model, and this stage was the easiest of all. I only need to look for my desired textures and painted it with the color that I want.
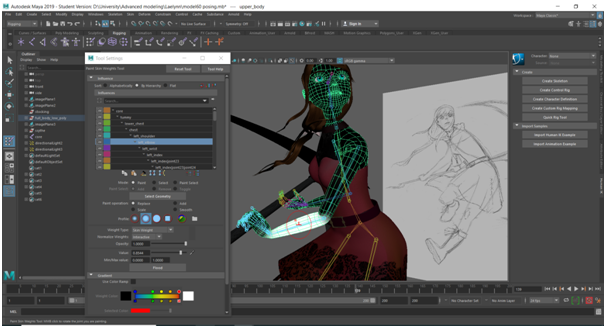
After the textures were all done, I continued with inserting the joints and paint-weight the limbs. The joints were like the bone of the character that made it possible for the character to bend, move, or rotate that a real bone could do, while the paint-weight is like painting to indicate which area will be affected by which joint. It wasn’t a difficult process, but it certainly required much time and patience to achieve the wanted result.
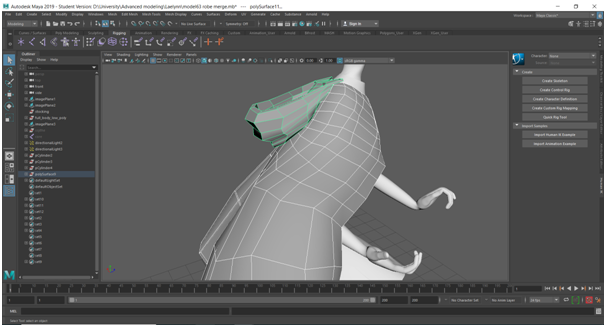
With the character finally in its pose, I could finally model the robe. I previously didn’t make it because I want to model it according to the in-pose body flow. The robe was made from two separate parts, the hood, and the main cloth. The main clothing was made from a cylinder (which I only took the upper part) then it was shaped accordingly and given a thickness like a real robe will have. The hood was also similarly made from a cylinder. After that, they were merged together
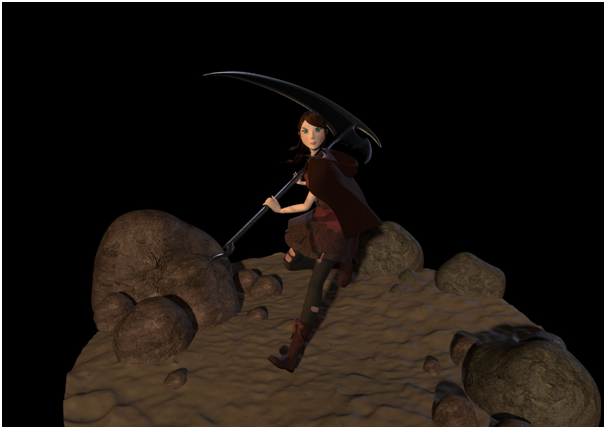
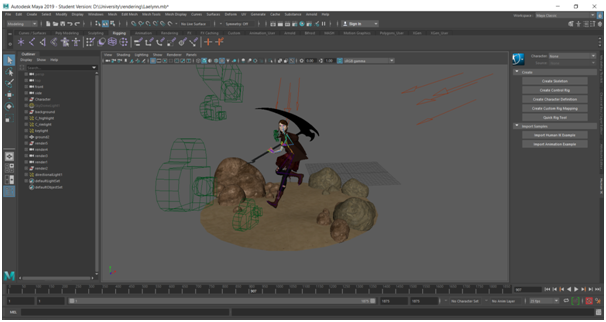
Lastly, I made rocks and ground to complement my character. Then, I added lighting and cameras to enhance and showcase my character. The lighting that I used basically followed the three-point-lighting rules where you have a key light, a fill light, and a rim light to enhance the object. Besides that, I also employed the contrast technique where my key and fill light have a warm tone while my rim light had a cold tone. Finally, the last step was only to render out the scene to see the final result!
The whole process of making this character from sketching until the rendering took me a full four months. Along the way, there were times when I found myself losing motivation in continuing it or just finding myself frustrated by doing the same thing over and over again. However, at the end of the day, when my character finally finished rendering, and I saw the result, I felt glad and satisfied. I felt very satisfied with myself because I could pull myself together and finished this first 3D character project of mine. At the same time, I also felt glad because my suffering is finally ending! I would say this whole journey was fun but tiring. I did my best in it and mustered all the techniques that I had. Although I couldn’t say this is perfect, you guys can make the final judgment yourselves, whether this character of mine is a yay or a nay!